Gear, Tips & Techniques
Words and Images by Daniel J. Cox | March 2025
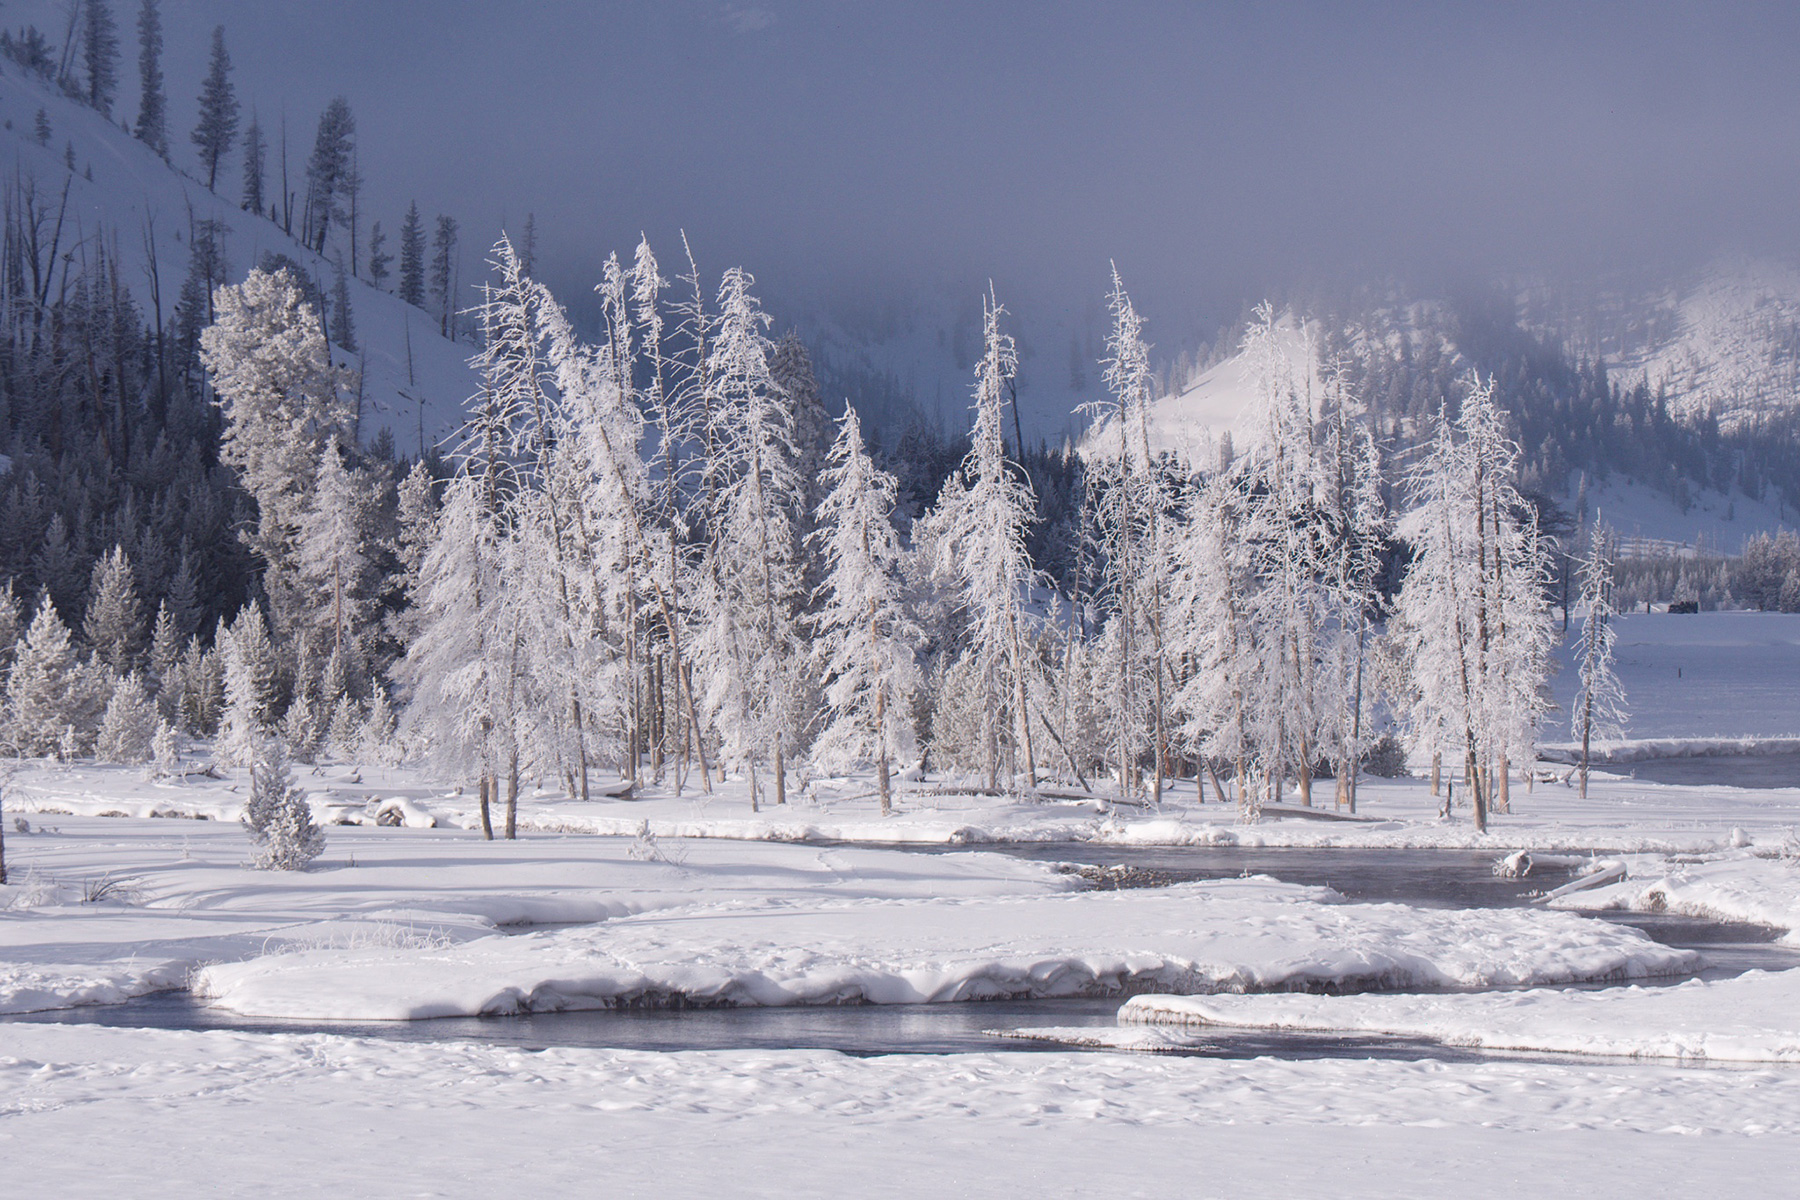
Winter in Yellowstone National Park can be really cold. So, you have to plan ahead to make the most of your Yellowstone winter adventure. I’ve lived next to this inspirational destination for over 30+ years, and winter is my favorite season for photography in the park.
Yellowstone is one of the coldest places in the United States in the winter. I grew up in northern Minnesota, so I know cold, and it doesn’t have to be uncomfortable. With the right gear, the amazing beauty of Yellowstone’s winter is a sight to behold. But you must be warm to enjoy it.
When I’m dressing for the cold, I believe the most important piece of gear you can buy is a pair of good boots. Don’t believe the dazzling negative temperature ratings all boot companies advertise. Instead, look for how thick the boot’s sole is. Ideally, it should be at least an inch thick, and more is better. The reason this is so important is simple. The further your foot is from snow and ice, the warmer you will be.
My go-to boot for serious cold is Cabela’s Saskatchewan GORE-TEX Insulated Hunting Boots. It’s by far the best cold weather boot I’ve used. But it’s a bit bulkier than my second favorite, the Schnees Extreme. Both are great but the Cabela’s is the ultimate for keeping your feet warm. The Schnees is best if you must do some hiking.
Next in importance is your outer clothing. Down and synthetic garments are the most effective way to fight the cold. The good ones are expensive but well worth it. Layering your outerwear, as well, is imperative.
I start with a synthetic type t-shirt that is close to my body. Patagonia has a nice selection. I often overlay that with a cotton flannel shirt. The next layer is a pile jacket. My favorite is Patagonia’s Better Sweater. If it’s really cold, I’ll often add what is referred to as a Down Sweater. North Face makes the Nuptice, and LL Bean their Down Sweater. There are others out there as well. Look for at least 600 Fill Power. 700 and 800 Fill Power are even warmer.
On top of this goes either a Gore-Tex or equivalent shell with a hood or a heavy-down parka. My current favorite shell is the KUIU Chugach TR Rain Jacket. If I need more warmth, I use my Canada Goose Expedition Parka. It all depends on how cold it is, and that’s the beauty of layering. You can mix and match, put on, and peel off. The morning starts out frigid, and by noon, the snow may be melting. You can change accordingly at a moment’s notice.
Next in line are my pants. Typically, I’m most comfortable in cold conditions with a nice thick pair of pile or down pants underneath a Gore-Tex or equivalent rain pant. For really cold weather I use a pair of KUIU Super Down Pro pants. I cover those with the KUIU Chugach TR Rain Pant. In cold weather, you won’t be getting wet, but good rain pants break the wind and stop any moisture if you end up on your knees or sitting. Ideally, I prefer my outer pants to have zippers that go completely up the sides, which the Chugach have. Full-length zippers make getting them on and off easier while wearing large boots.
The right gloves are essential. I use two different types of gloves when shooting in cold conditions. When it’s really cold, I often wear the thickest gloves I can find. If the temperatures aren’t extreme, my favorite gloves are Head. They have rubberized nubs on the palms and fingers, making it easy to grip your camera, and are not overly thick. The downside is they’re often not warm enough when it gets really cold, so I also bring a thicker pair. Chemical and electric hand warmers are a wonderful luxury.
Something I see many people doing is wearing fingerless gloves. I’ve never understood that. I’ve never had the palms of my hands get cold. I’m amazed how fingerless gloves have caught on. Those who use them often say, “I can feel the controls of the camera better.” But unfortunately, you can’t feel anything once your fingers go numb. That typically happens in less than five minutes when you’re holding a metal camera.
Admittedly, using a heavy or moderately thick glove can be problematic for accessing camera buttons, dials etc., but with practice, you get used to it. You’ll make some mistakes and even miss some pictures, but good gloves are at least as fast as fumbling with frozen, numb fingers, and you have the advantage of not being frostbitten or freezing your flesh. Bring a good pair of gloves for comfort. No picture is worth losing your fingertips.
A warm hat is a must. Ideally, it should have some sort of wind guard or windproof material. Cabela’s and LL Bean are good suppliers. You might also want to bring a baklava or face mask. The wind can be harsh this time of year, and a cover-up for your face is a nice bonus.
Next on the list is camera equipment. The most problematic piece of your gear in cold weather is batteries. If your camera uses lots of battery power in warm weather, plan to double the use in the cold. Typically, in extremely cold conditions, I keep a spare battery in my pile pants pocket, the one closest to my body. My body heat keeps it warm, and when the battery in the camera starts to die, I just swap it out for the one in my pocket. When the new one in the camera gets cold and starts to go dry, I just reach for the pocketed one, and by this time, your body heat will have warmed it back to life.
A good camera bag is a must. If you’re traveling by snow coach and spending most of your time driving to pullouts, a roller bag is my favorite way to contain my gear. I use the Lowepro Whistler 400. It holds a lot of gear, which I’ll detail in a moment. The Internal Camera Unit (ICU) pops out and can be added to a backpack like my Fstop Ajna when I want to take more gear on a hike. Keep in mind, there aren’t as many places to hike in the winter but taking your gear into a geyser basin is a definite possibility.
Documenting any place as beautiful as Yellowstone in the winter requires lenses from wide to telephoto. Since much of what you’ll be shooting is landscapes, a wide angle is a must.
It’s always good to have at least two bodies. I shoot with three, mainly because I don’t want to change lenses in the field. It’s especially important not to expose your camera sensor to the elements when even tiny bits of snow are flying around. Three cameras allow me to have a wide-angle, medium-telephoto, and super-telephoto at my disposal without changing lenses. And don’t forget a dry paintbrush to remove snowflakes from your gear.
Early in my career and for the next 25 years, you couldn’t get me to shoot a photo without a tripod. But today, with the phenomenal image stabilization all cameras have, I almost never use a tripod. However, as easy as it is to hold a lens steady with all the new IS, it’s still nice to have a tripod to take the load off.
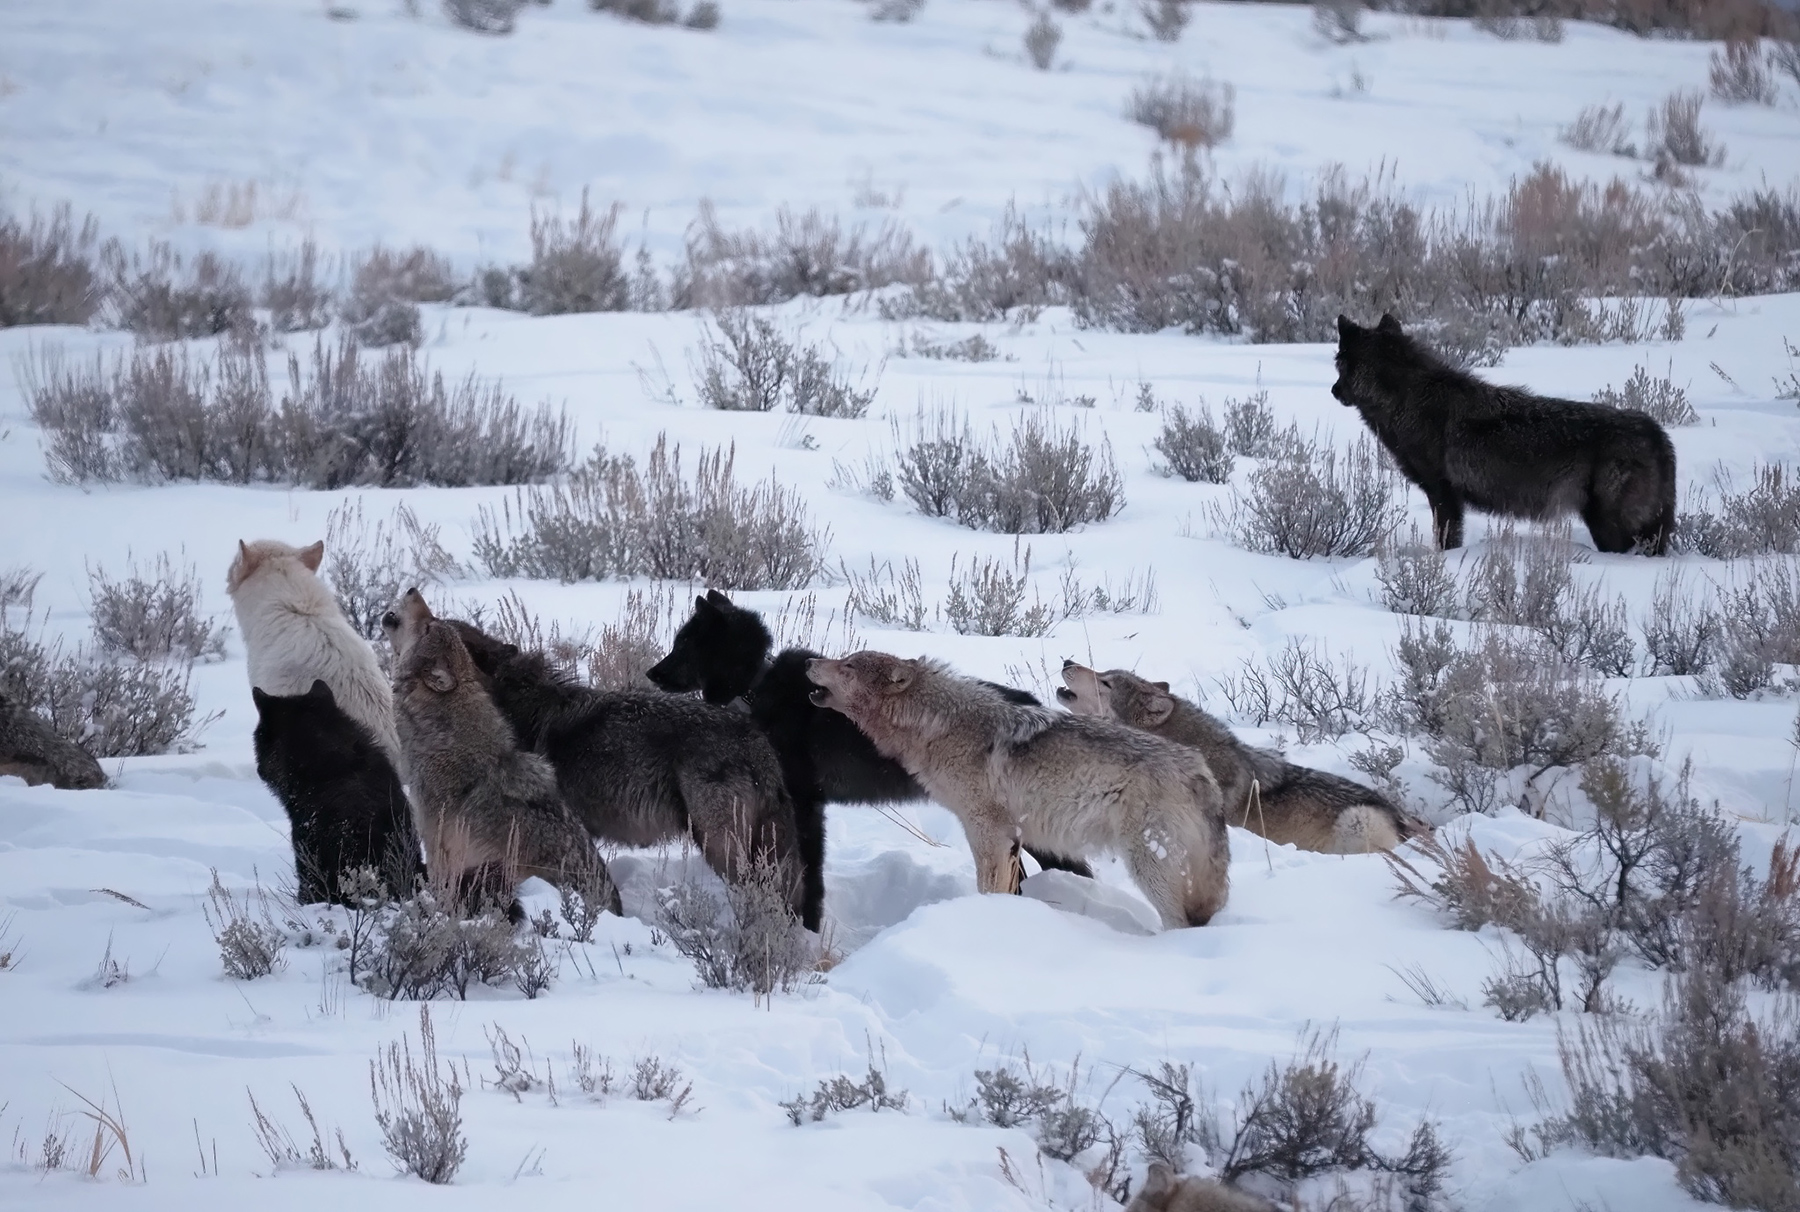
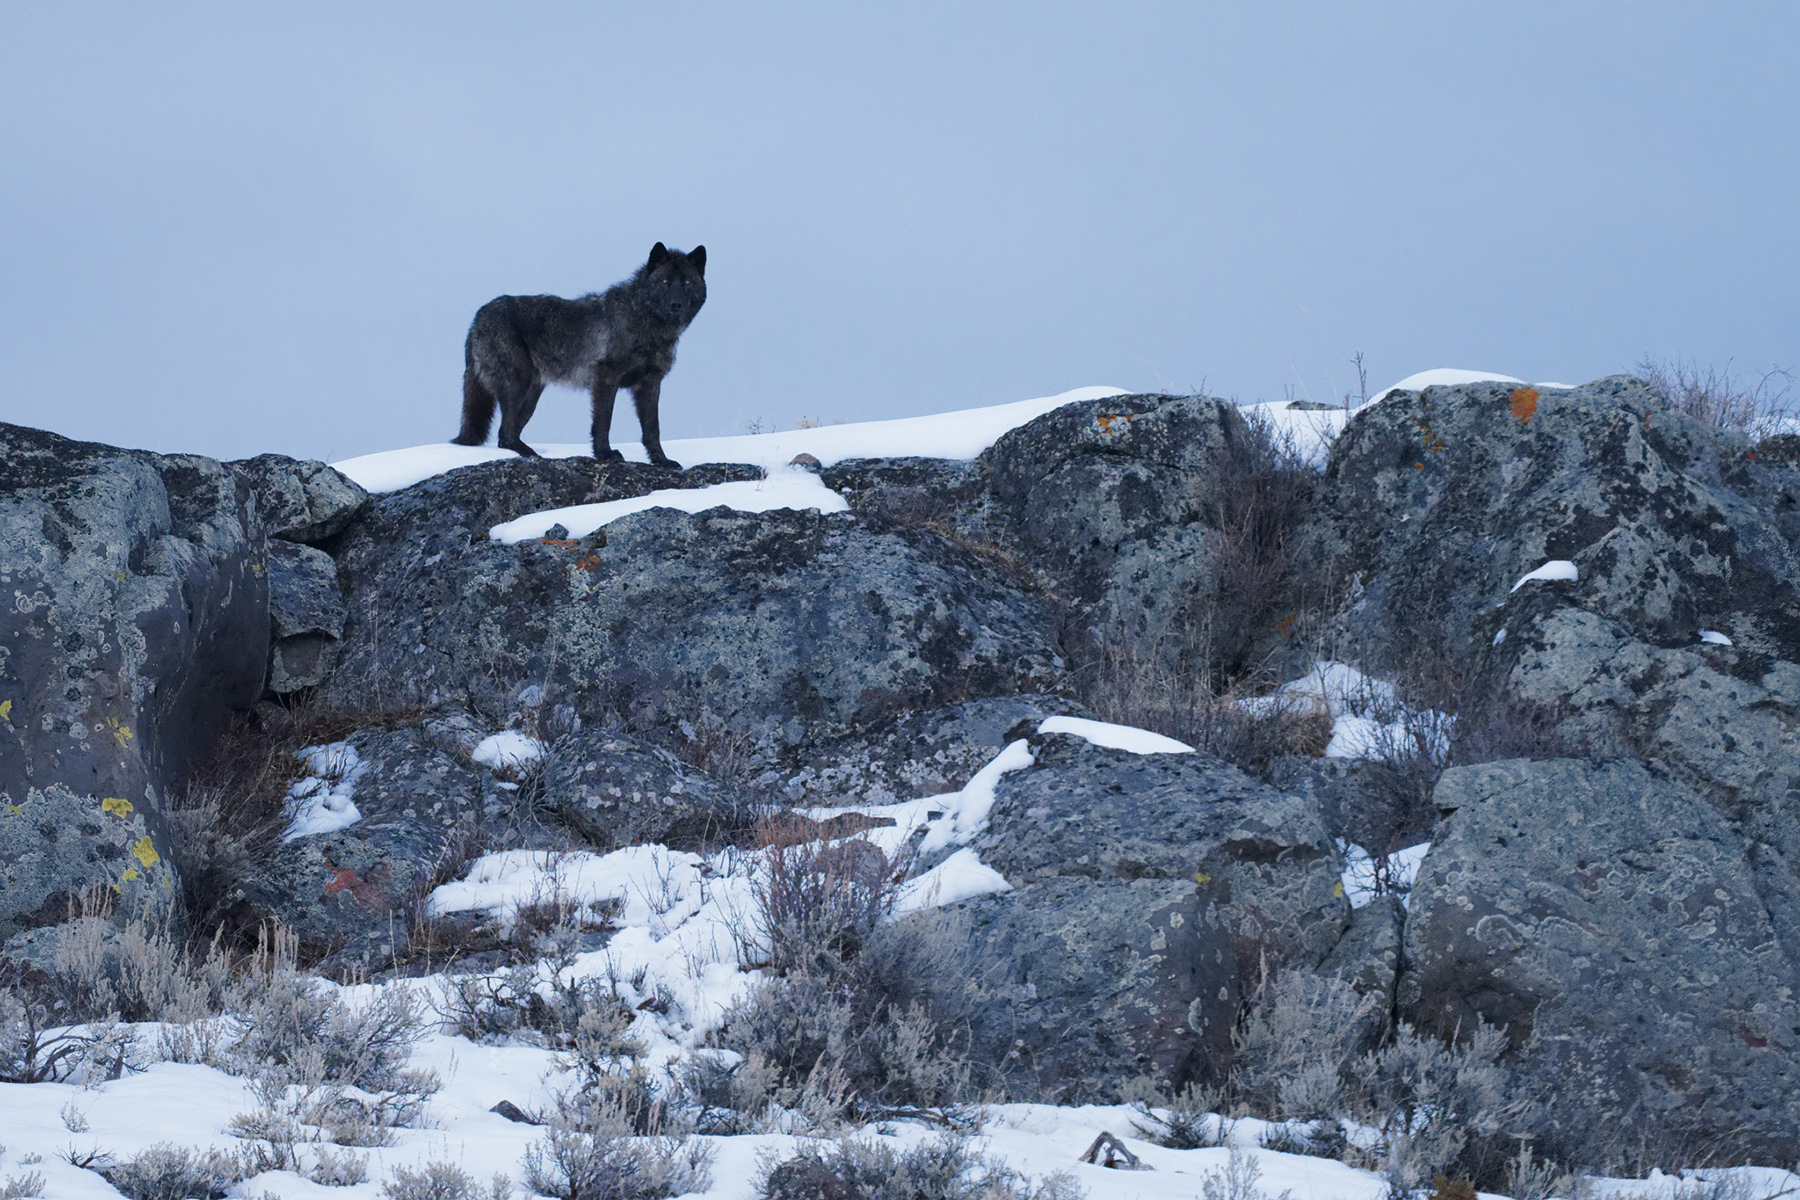
Many people ask me about photographing wolves in Yellowstone. And all I can tell them is, “You can’t go to Yellowstone thinking you’re going to photograph wolves. You have to go there for other reasons, and the wolves will find you if you spend enough time looking.”
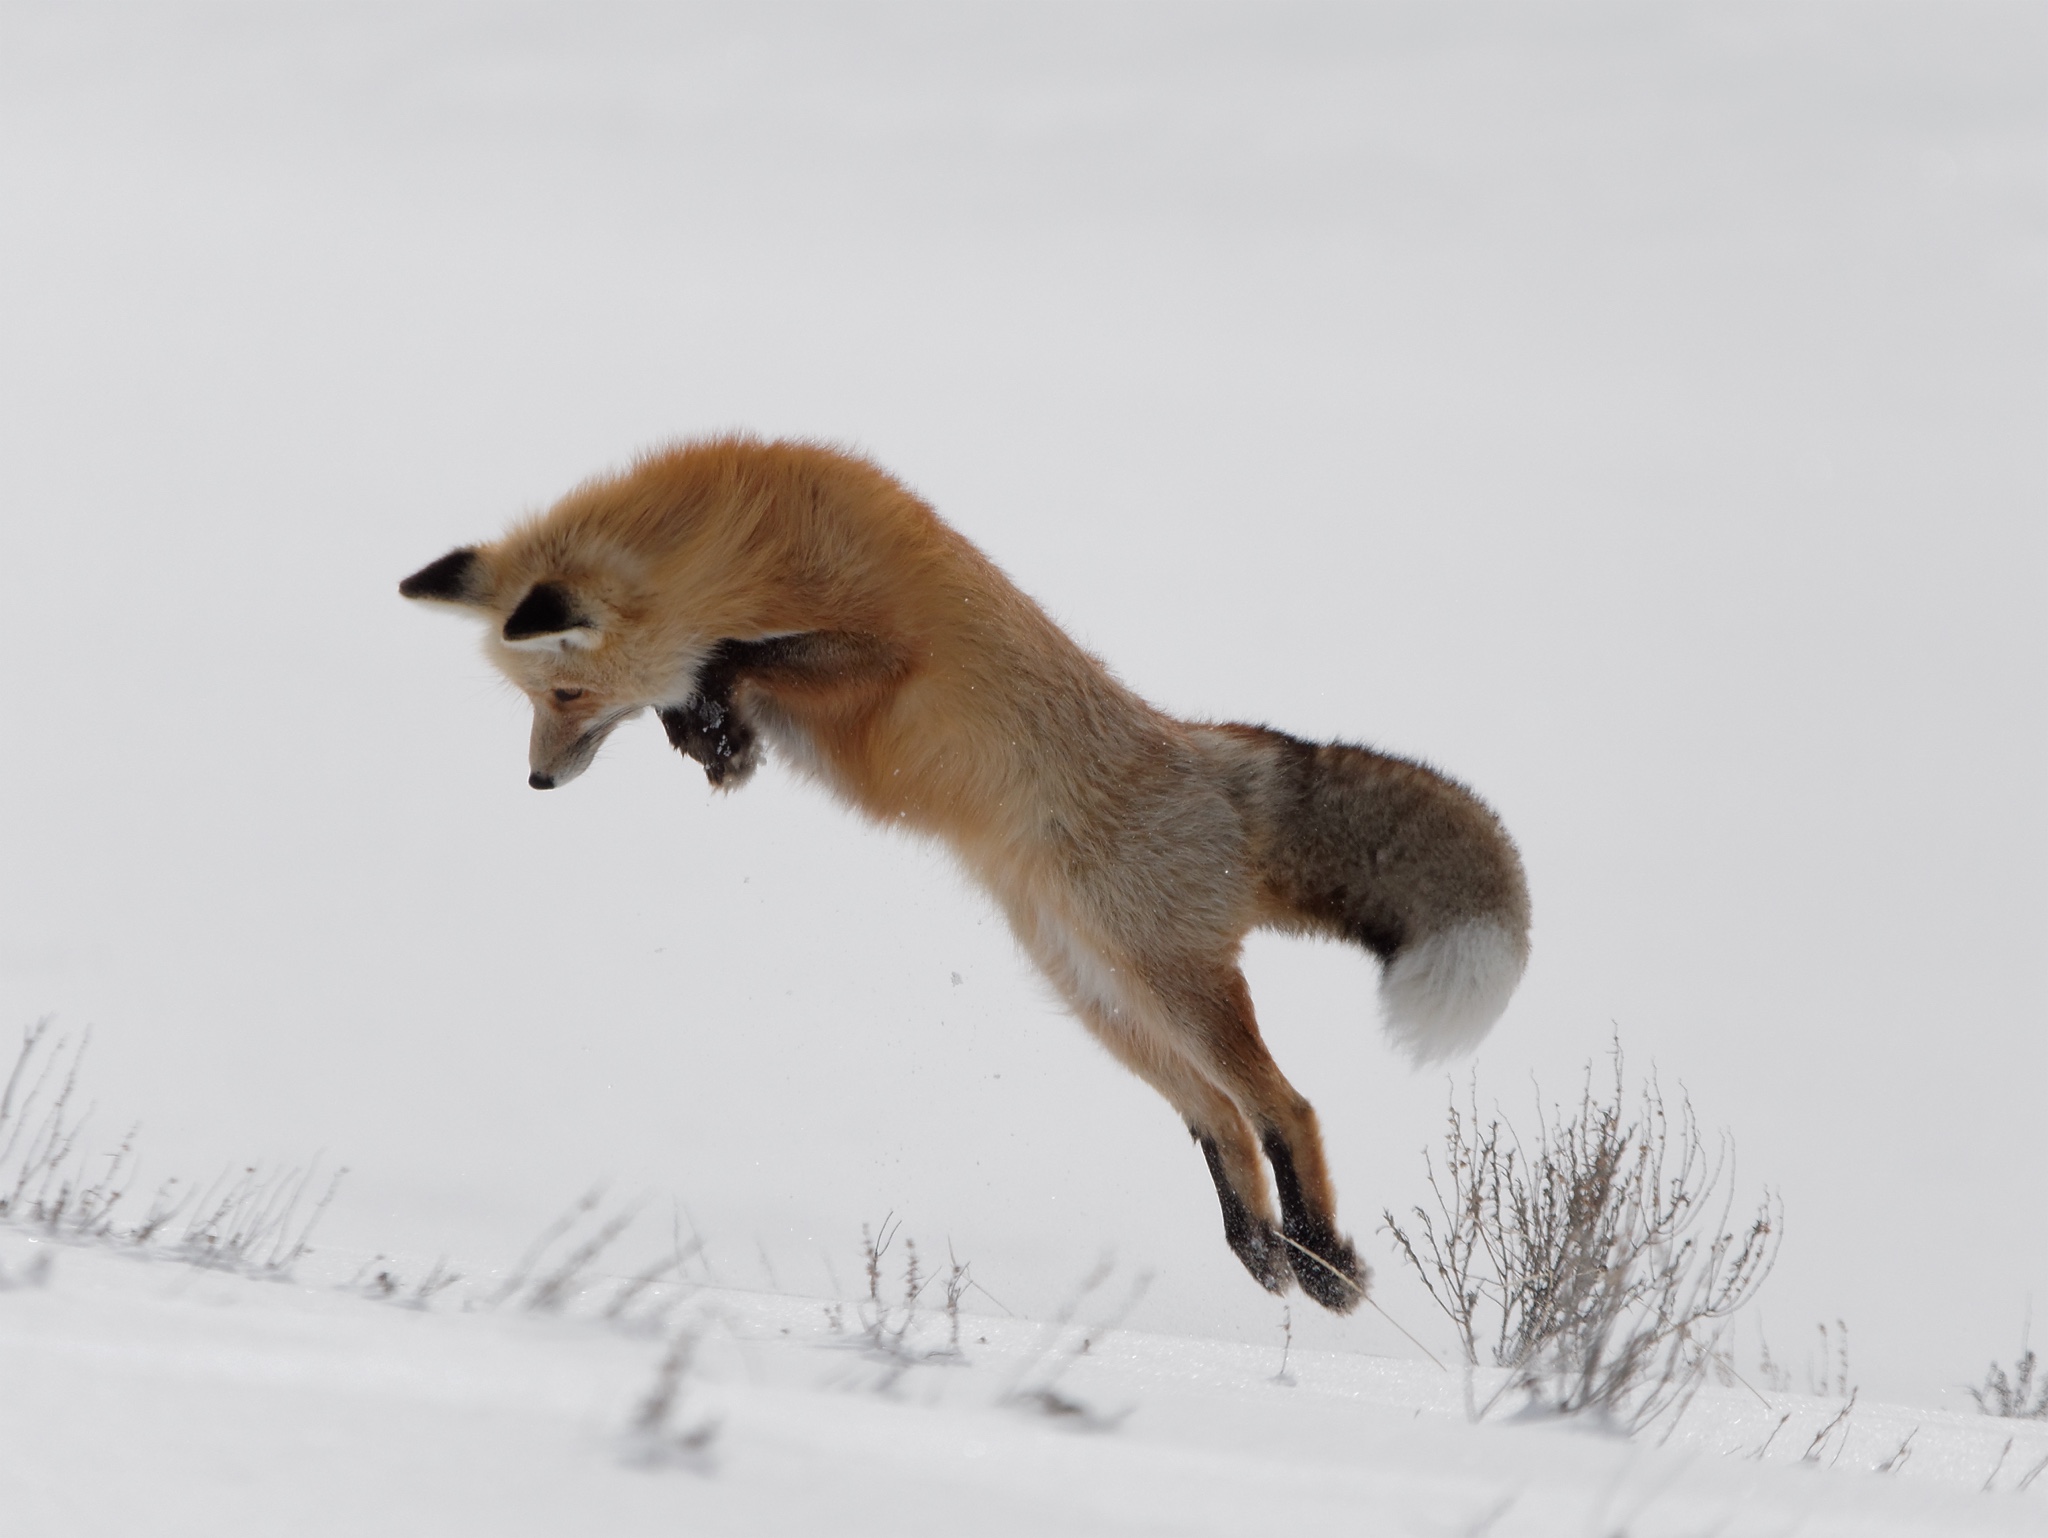
With that in mind, you should be prepared and, oftentimes, very quick to mobilize. Whenever I’ve been lucky enough to encounter wolves, bears, ermine, owls, it’s always when I’ve least expected it.
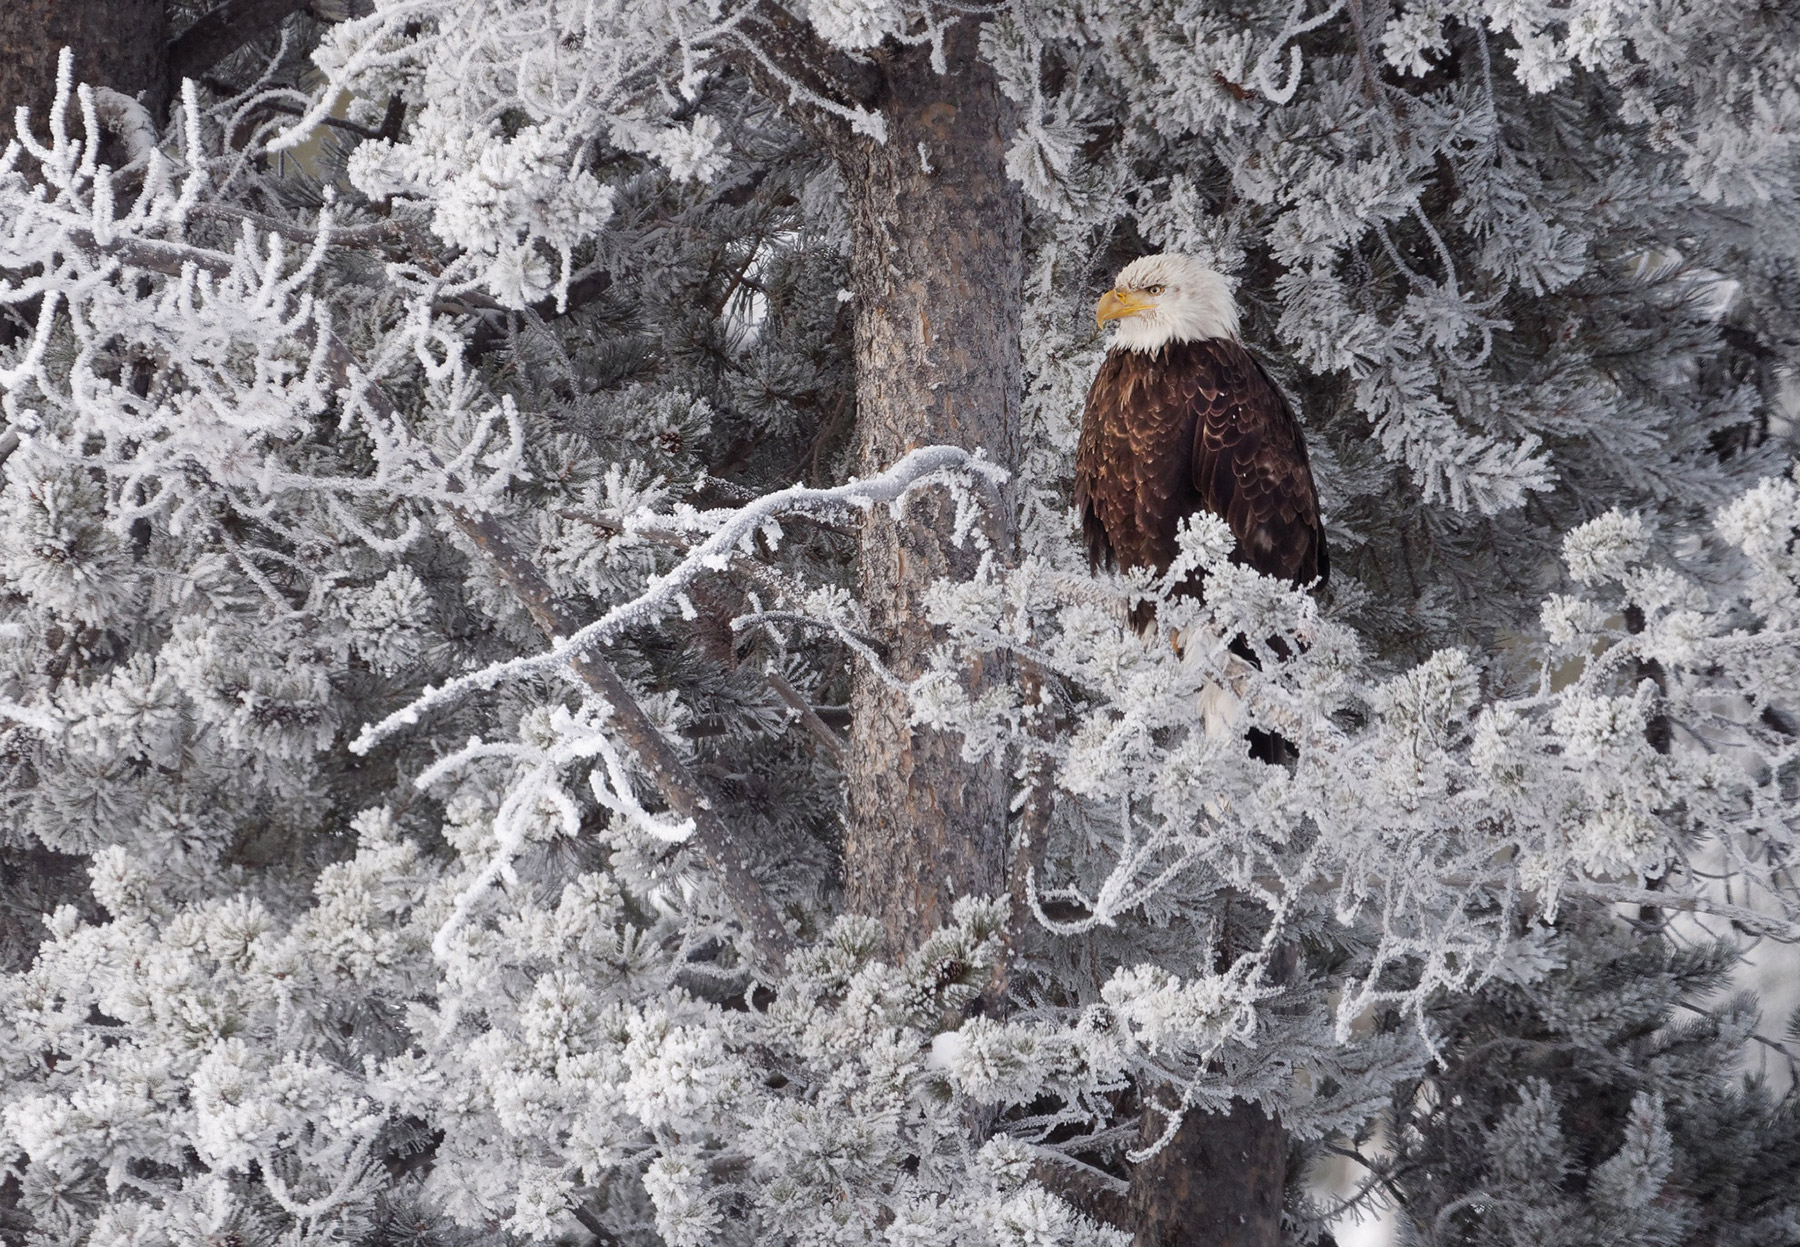
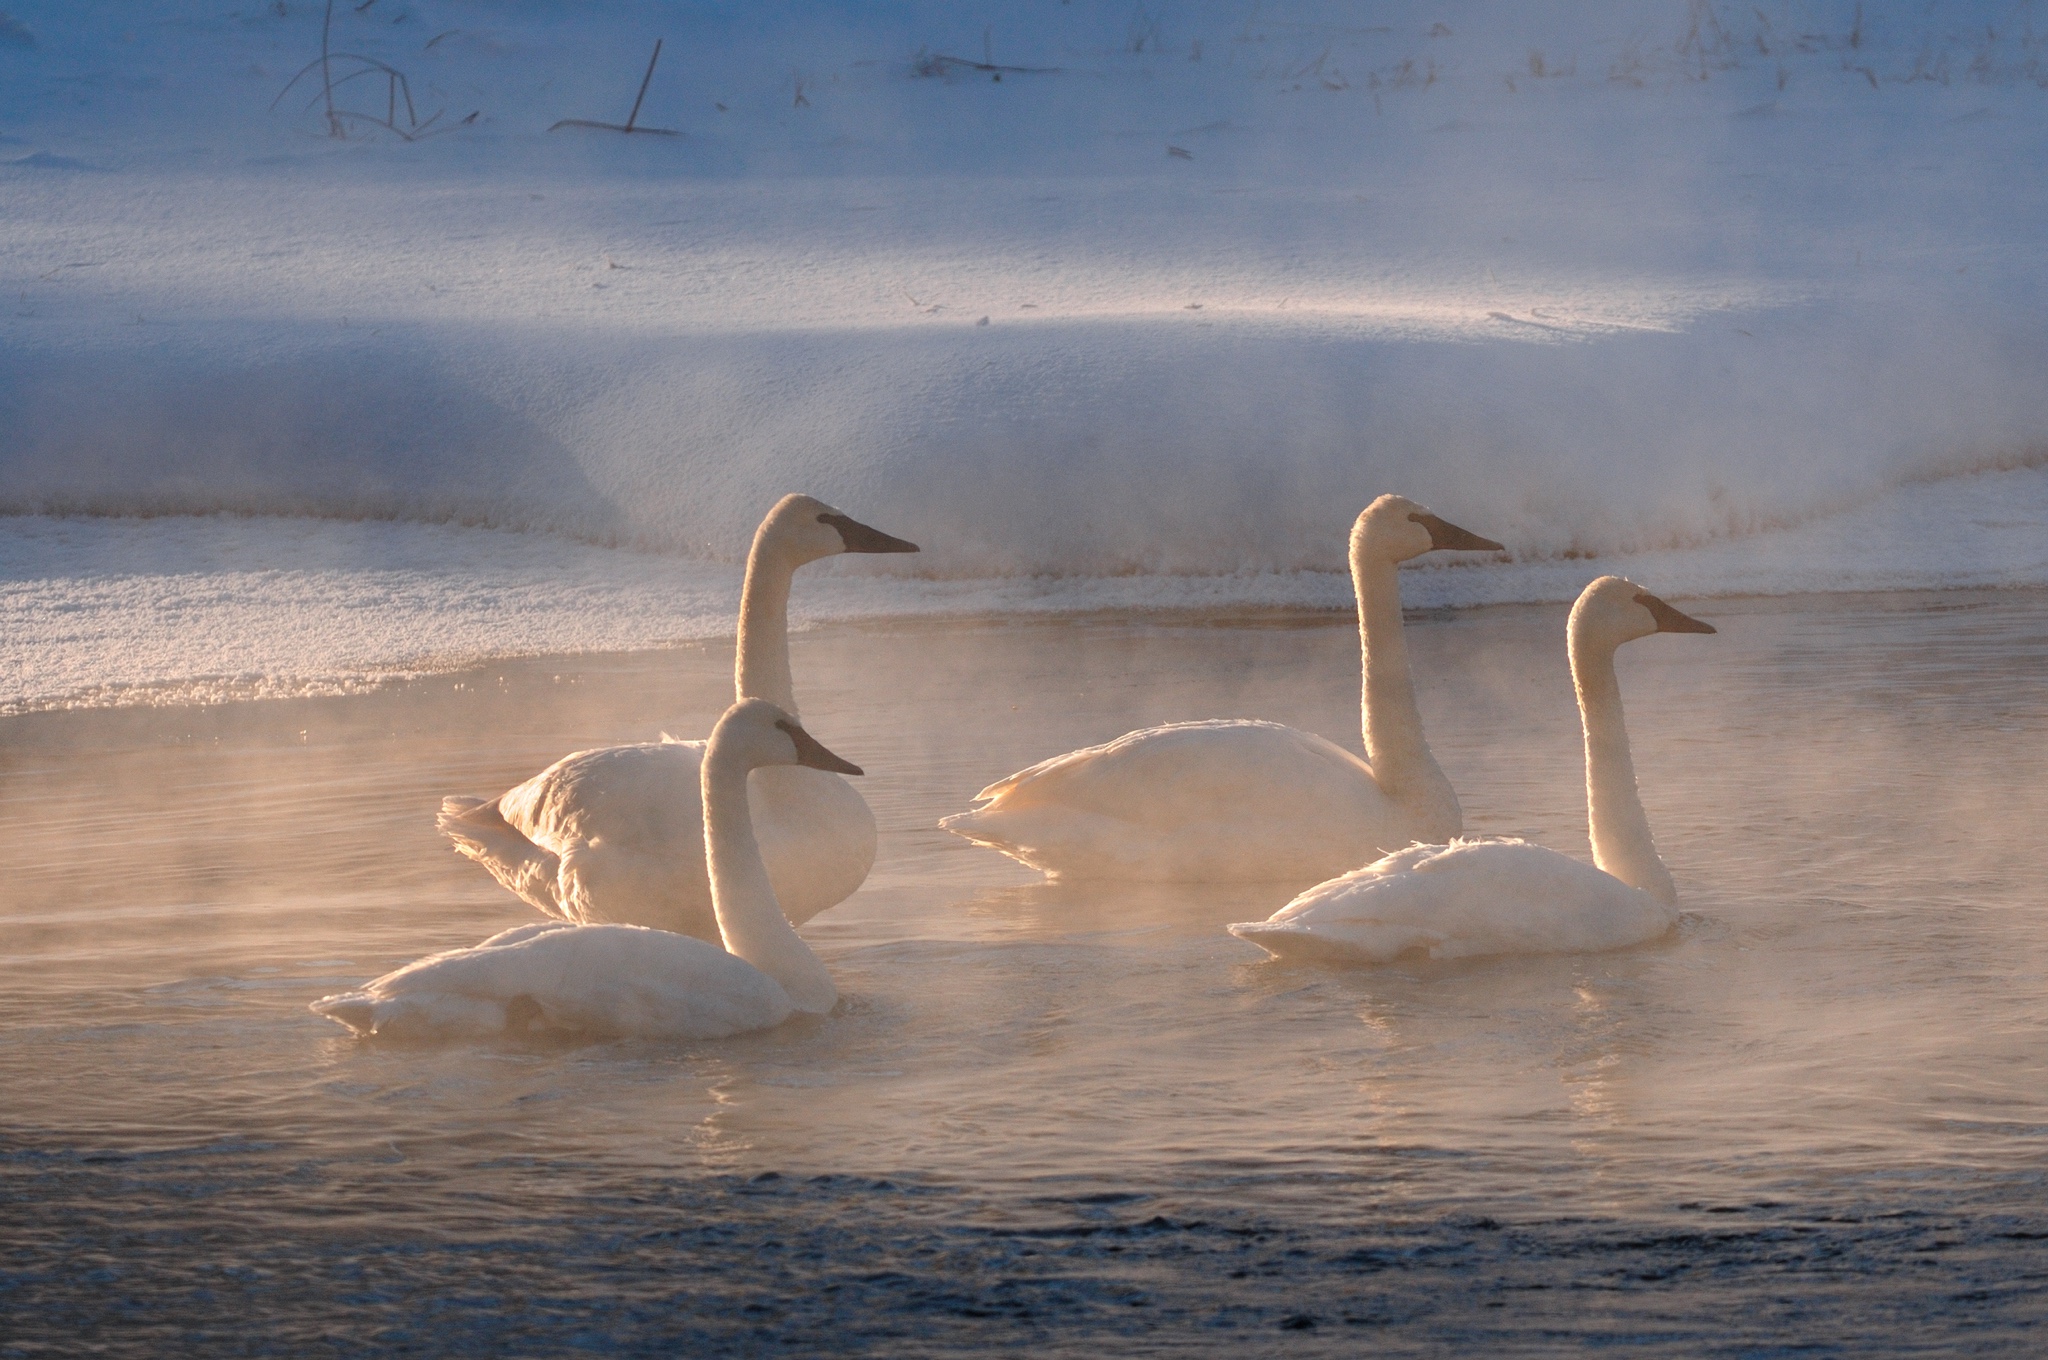
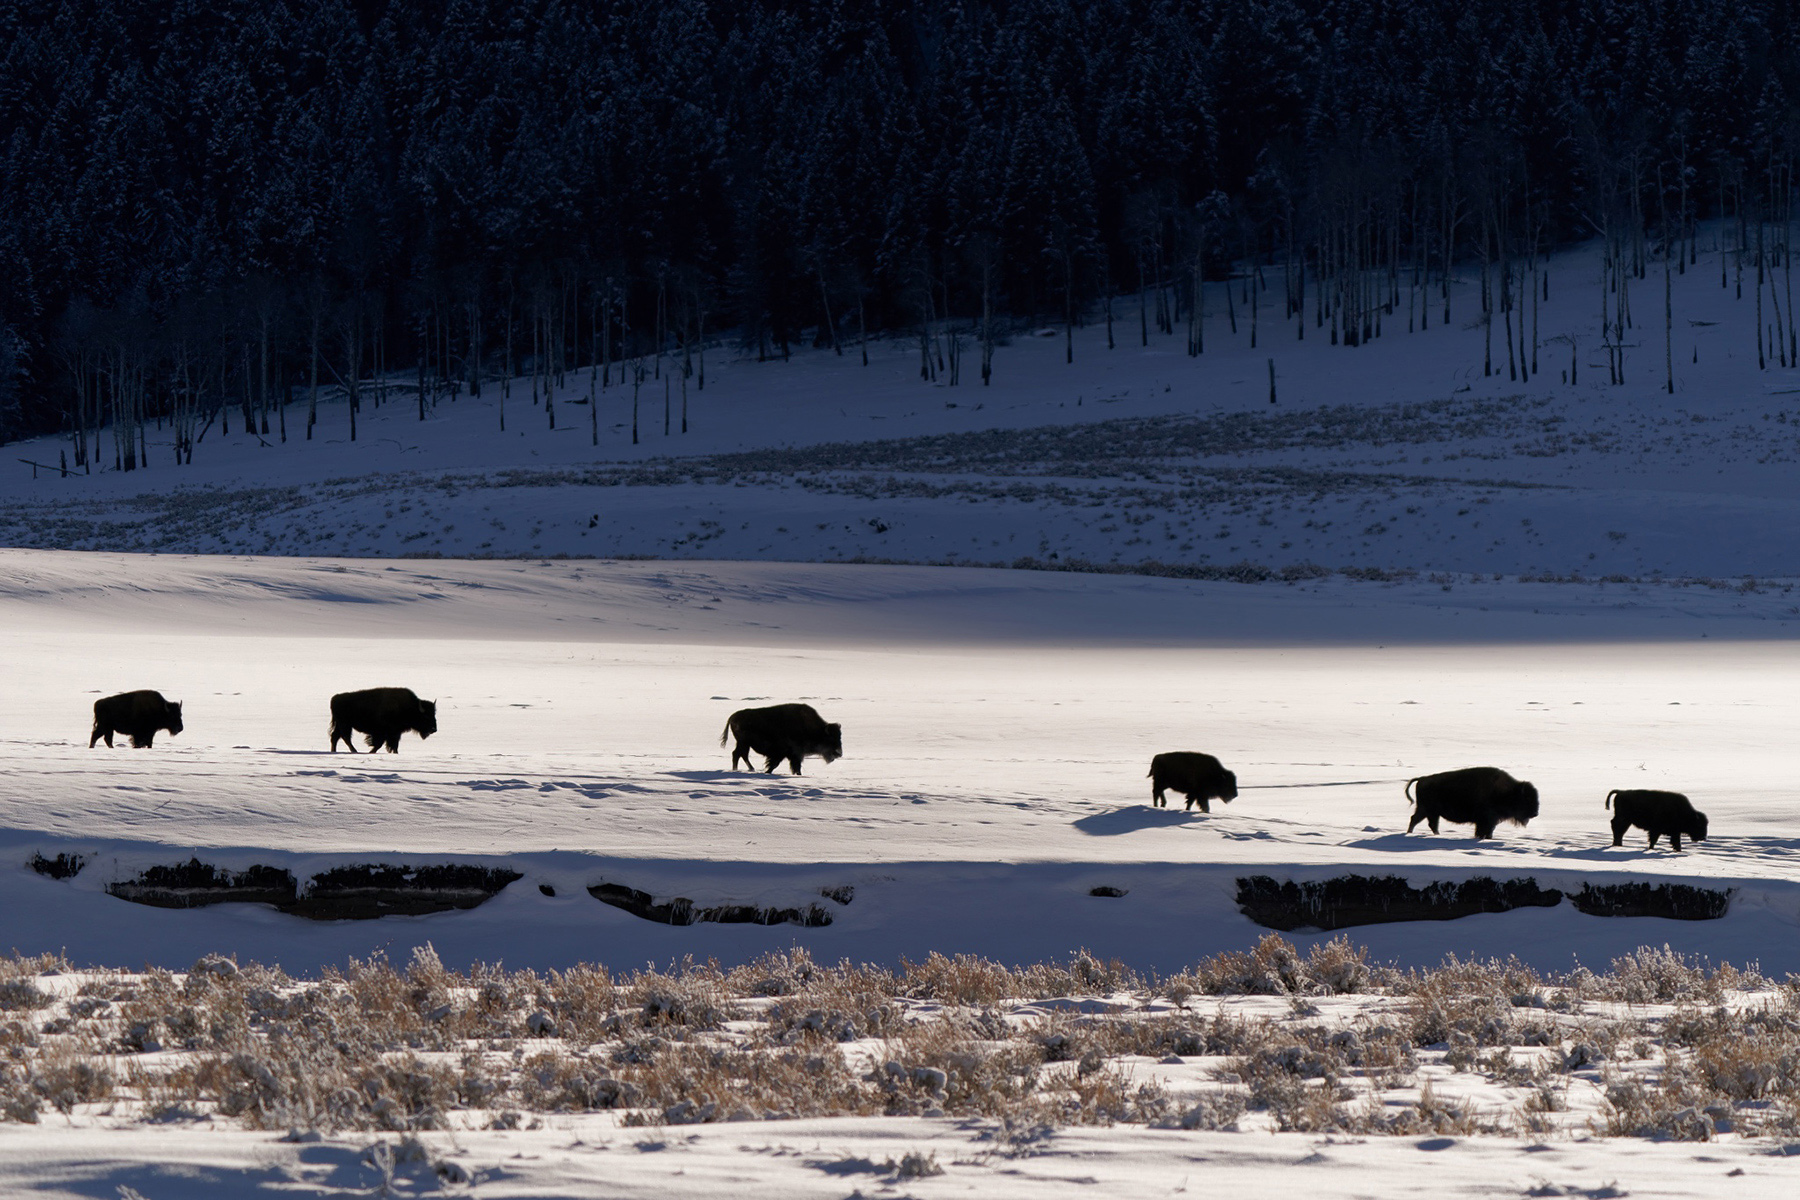
Spending time in our nation’s first National Park in the winter is a bucket list item for many photographers. With so many wild animal species and world-class landscapes, it’s easy to understand why. I’m confident that with the above suggestions, should you decide to go, you’ll return with world-class pictures and a once-in-a-lifetime experience you’ll never forget.
See more of Daniel J. Cox’s work at naturalexposures.com.
Get Annual Subscription